It might seem that 3D printing in dentistry is still in its infancy. Many dentists are still finding their way to digitalisation, and although dental and orthodontic laboratories already routinely work with digital models from intraoral scanners or by scanning plaster casts, it is widely believed that a quality and economically acceptable product can only be obtained by milling. However, the reality is much more advanced in our country. It is not uncommon to find a laboratory in your area that has already undergone complete digitalisation and plaster models have become only a marginal matter for it. Digital technology, and 3D printing in particular, has come so far that the equipment and its operating software (and we are not just talking about closed systems) are so advanced that their integration into existing production processes is almost painless and they can be operated by otherwise "digitally unskilled" personnel after short training. It is safe to say that the current situation can be named a new era in dentistry, Dentistry 4.0, after the digitalisation of industry (Industry 4.0).
How does a 3D printer for dentistry work?
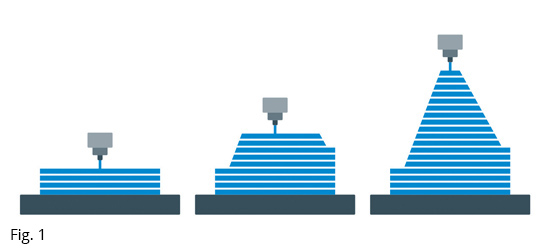
Since necessity is the mother of invention, a lack of resources in the past (materials, instruments) gave rise to the "golden Czech hands". Thus, we can be proud of the fact that a company has been established in the Czech Republic, which is a world leader in this category with its 3D printers, and many people, not only dental professionals, already know and use these printers. More than one DIY workshop is equipped with filament 3D printers that work on the principle of layering molten plastic, a process known as FDM (Fused Deposition Modelling). They are used in various handicraft and technical clubs at schools, etc. The FDM printing principle is similar to decorating cookies, progressively adding more and more layers (Fig. 1). Printing is inexpensive, the mechanics are simple – it's a great tool to use even in the professional sphere for quick design verification and basic prototyping.
However, dental printers work on a different principle, one which is even older than FDM. Its history dates back to 1981, when the first machine, based on the principle of stereolithography (SLA), was developed in Japan, and it’s this principle which is also used in dental printers. Thanks to very advanced materials (strong and mechanically resistant), the same principles of 3D printing, and sometimes even the same printers as in dentistry, are used in industry for the mass production of final products. The principle of SLA 3D printing has further developed into LCD (Liquid Crystal Display) and DLP (Digital Light Processing) stereolithography technologies, about which you can read more in the article at https://www.stomateam.cz/cz/digitalni-technologie/uz-mate-vybranou-3d-tiskarnu-pro-svoji-praxi-nebo-laborator, where you can also recall the important features of 3D printers for dentistry.
So how does a 3D printer based on SLA printing technology actually work? In layman's terms: a liquid material hardens into a solid material under the influence of UV radiation. This is a well-known principle. But how is a printed object, for example a working model, actually created? The basic principle, which is common to the vast majority of devices on the market, will be described using an LCD 3D printer (Fig. 2).
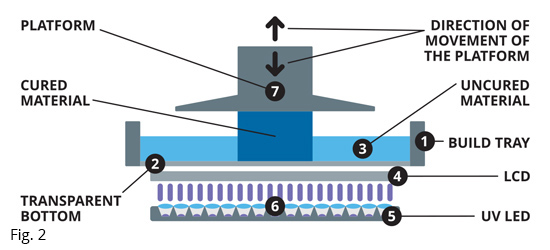
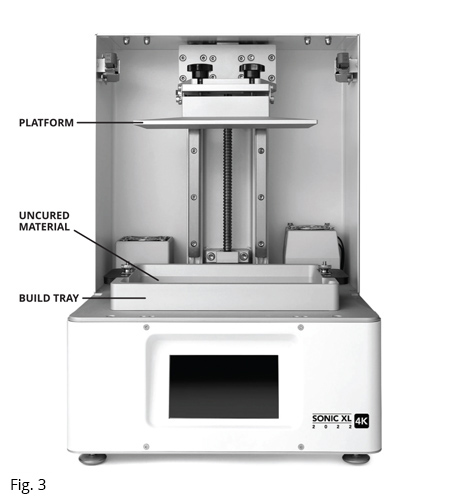
A melted material 3 (resin or photopolymer resin) is poured into a container 1 with a transparent bottom 2 (build tray). Underneath the transparent bottom made of a 100-150 μm thick rigid flexible film (so-called FEP or non-FEP film) is an LCD panel 4 (in principle the same as that found on computer monitor screens or displays, tablets or phones) with dozens of UV LEDs emitting ultraviolet radiation 5. Through the optical elements 6 which, together with a large number of diodes, ensure the uniformity and homogeneity of the light beams, the UV radiation hits the bottom of the build tray with the liquid printing material. A so-called platform 7 is immersed in the tray with the material, which gradually emerges during the printing of individual micro layers of material and the solidified model "sticks" to it. The platform moves only in the vertical Z-axis and is usually the only moving part of resin printers (Figs. 3, 4).

The virtually designed 3D object to be printed is "sliced" by the software (slicer) into individual layers (usually with a thickness of 50 or 100 μm) and these are sent to the printer as a set of black-and-white images, which the monochrome LCD screen sequentially displays, i.e. sequentially reveals the individual surfaces in the specified range through which the UV radiation passes. The liquid material is cured on the illuminated surface and at the same time adheres to the previous layer. After each illuminated cured layer, the platform moves upwards and more layers are illuminated until the entire object, hanging upside down from the platform, is printed
3D printing of an orthodontic model and the end of plaster casts in the Czech Republic?
Now that we know the principle of 3D printing, let's take a closer look at how easy it is to use such a printer and how simple the whole process of printing one of the basic products is – an orthodontic model for thermoforming stabilization and retention splints.
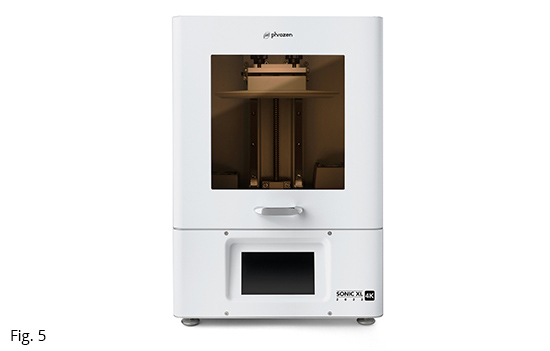
For the demonstration we will use a 3D printer based on the LCD principle from a proven brand popular also in our Central European markets, Phrozen, in a version designed for dentistry – Phrozen Sonic XL 4K 2022 (Fig. 5) features high resolution for precision printing, a heated print chamber to ensure a higher and stable print material temperature (reducing material viscosity, more accurate Z-axis printing, and the ability to print more demanding materials), and light output control to easily compensate for LCD panel ageing and extend LCD panel life. Printers in this category (LCD technology, resolution, quality of the LED source, robustness of the mechanism and other equipment) are generally considered to be in the so-called "entry level" class, devices with sufficient parameters and ease of operation for basic use in dentistry.
1. Input data – digital model in .STL format
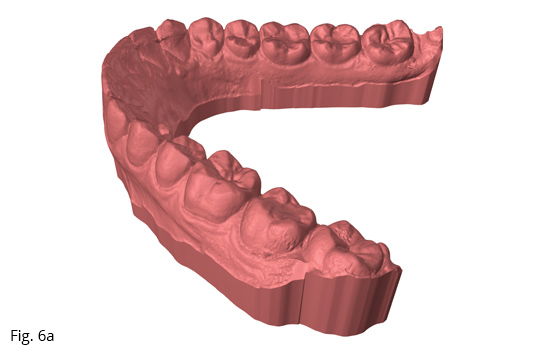
Ideally, we get the digital data directly from the customer, who has an intraoral scanner and can send the digital model to the lab via the internet in any of the many known ways, free of charge. For customers who prefer conventional impression printing, there is no choice but to wait for the delivery of the impression, produce a plaster model and digitise it using a laboratory (or intraoral) scanner. The result of this step is a digital 3D model of the jaw in .STL data format (Fig. 6a).
Time requirement: 0 minutes (for a digital model).

2. Preparing the model for printing
In the next step, we use software called Slicer (from the word "slice"), which creates instructions for the printer from the digital model, i.e. slices the digital model into layers (Fig. 6b). The software usually comes with the printer, or else you can use another software that is compatible with the printer. For example, Chitubox or LycheeSlicer are very popular and free. The above-mentioned printer is supplied with a program that is adapted to the needs of dentistry (Phrozen Dental Synergy Slicer), where, after opening the 3D model using a very simple and intuitive control, we select the correct orientation to the substrate, or we "hollow out" the model (saving about 25% of the printing material) and add drainage channels. Finally, we insert a label with the job identification on the model and press the button to generate instructions for the printer, which we send to the printer via the WiFi interface or via the printer's web interface.
Time requirement: 6 minutes for operation.
3. Příprava 3D tiskárny a spuštění tisku
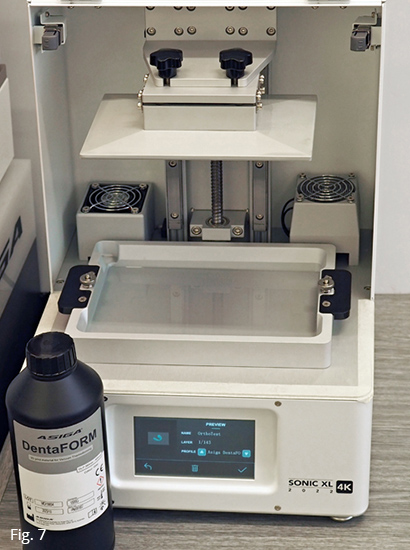
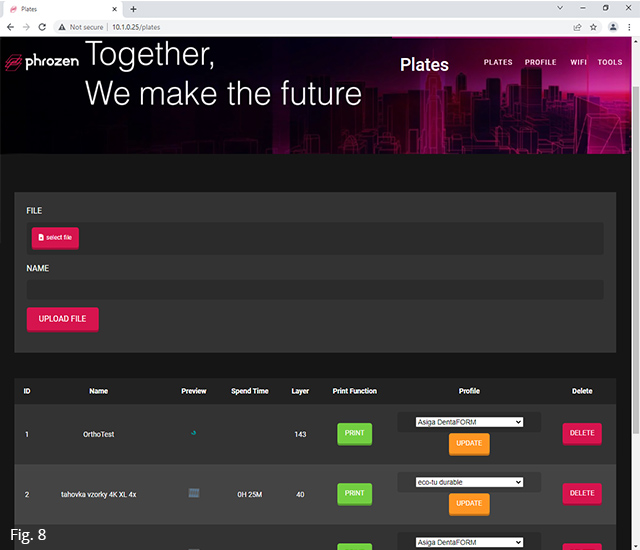
Příprava tiskárny spočívá hlavně v její kontrole: čistý LCD panel, žádné nečistoty v zásobníku nebo pod ním. Velmi důležité je zkontrolovat, zda nejsou žádné zbytky materiálu z předchozího tisku na platformě. Pokud se totiž při aktuálním tisku na platformě vytvoří díky nečistotám silnější vrstva materiálu než 50/100 µm (platforma se přiblíží na tuto vzdálenost ke dnu zásobníku) zákonitě způsobí nevratné poškození fólie – průhledného dna zásobníku, v horším případě i poškození LCD panelu, který je ihned pod ním. Po kontrole už jen nalijeme dostatečné množství tiskového materiálu (nezapomeneme jej promíchat) do zásobníku – v našem případě jsme použili materiál ASIGA DentaFORM. Tady stojí za zmínku, že i na strojích „nižší výkonnostní kategorie“ lze s použitím kvalitního materiálu docílit lepších výsledků. Nyní už jen zavřeme tiskárnu, na dotykovém displeji vybereme naši úlohu a dalším stiskem ji spustíme (obr. 7). Pomocí webového rozhraní (obr. 8) můžeme sledovat průběh tisku.
Časová náročnost: 4 minunty pro obsluhu + 75 minut zařízení.
3. Preparing the 3D printer and starting printing
Preparing the printer is all about checking it: clean LCD panel, no dirt in or under the tray. It is very important to check that there is no residual material from the previous print on the platform.
If during the actual printing a layer of material thicker than 50/100 μm is formed on the platform due to dirt (the platform approaches the bottom of the tray at this distance), it will cause irreversible damage to the film – the transparent bottom of the tray, and in the worst case, damage to the LCD panel, which is immediately below it. After checking, we simply pour a sufficient amount of printing material (don't forget to mix it) into the tray – in our case we used ASIGA DentaFORM material. It is worth noting here that even on machines in the "lower performance category", better results can be achieved using quality material. Now we just close the printer, select our job on the touch screen and press again to start it (Fig. 7). Using the web interface (Fig. 8), we can monitor the progress of the print.
Time requirement: 4 minutes for operation + 75 minutes for the device.
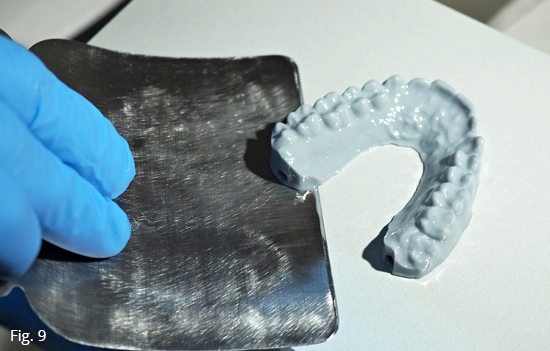
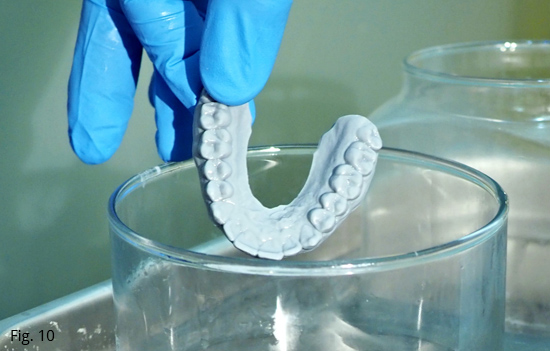
4. Removing the print from the platform and rinsing
After printing, remove the platform by loosening the two screws to allow easier access to the printing surface and easier separation of the model from the platform with a metal spatula (Fig. 9). The model that has just been printed now needs to be cleaned of excess material that has adhered to it during the printing process and has not had time to drip off, by rinsing it in isopropyl alcohol (IPA 98% or higher), which is ideally done in an ultrasonic cleaner (Fig. 10). It is also possible to use cheaper, but less effective cleaners operating on the principle of liquid swirling, where rinsing takes about twice as long. For our material it is 5 min. (pre-rinse) in one + 5 min. (final rinse) in the second vessel.
Time requirement: 6 minutes for operation + 20 minutes for the device.
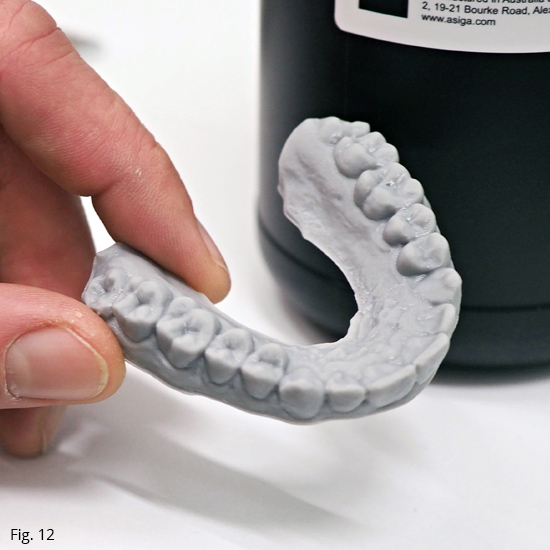
5. Vytvrzení výtisku – finální polymerace
Před finálním vytvrzením výtisku je důležité mít model suchý, bez zbytků čisticí kapaliny. Můžeme buď počkat, než se kapalina odpaří, nebo oschnutí urychlíme ofouknutím stlačeným vzduchem. Procesem vytvrzení se rozumí dodatečné osvícení intenzivním UV zářením (obr. 11), aby došlo k úplné polymerizaci tiskového materiálu a materiál získal své finální fyzické vlastnosti, zejména pevnost. Od požadavků materiálu a výkonu zdroje UV záření se odvíjí i potřebný čas na vytvrzení. Nám postačí 20 minut v komoře Phrozen Cure a model je hotový a připravený pro výrobu retenční dlahy termoformingem (obr. 12).
Časová náročnost: 3 minuty pro obsluhu + 20 minut zařízení.
5.Curing of prints – final polymerisation
Before finally curing a print, it is important that the model be dry and free of cleaning fluid residue. We can either wait for the liquid to evaporate or accelerate the drying by blowing it out with compressed air. The curing process refers to additional illumination with intense UV radiation (Fig. 11) in order to fully polymerize the printing material and to give the material its final physical properties, especially its strength. The curing time required depends on the material requirements and the performance of the UV source. We only need 20 minutes in the Phrozen Cure chamber and the model is ready and prepared for the production of a retention splint by thermoforming (Fig. 12).
Time requirement: 3 minutes for operation + 20 minutes for the device.

And our costs?
Now let's take a look at the costs involved in producing a working model so you can get a better idea and compare the result with the actual production process and its time and financial requirements.
Time spent by the operator on the production of one model: 19 minutes
Total production time: 134 minutes = 2 hours 14 minutes (printer can produce up to 8 models simultaneously)
Material 10 ml = 34 CZK without VAT
Purchase price of a printer of a given class including accessories and training: from 80 000 CZK without VAT
What does maintenance and service look like?
Although the 3D printer is a sophisticated production tool, taking care of it is very simple. It is enough to ensure the cleanliness of the optical parts (tray, LCD) and the platform and to carry out maintenance prophylaxis according to the load level.
In terms of component life, the tray film requires the most frequent replacement. It can be replaced by anyone who knows how to use a screwdriver. The second most worn component is the LCD panel with a lifespan of about 2000 hours, with UV transmittance decreasing over its lifetime. This is why it is useful to have adjustable UV LED power, which can gradually compensate for the reduction in LCD panel throughput, instead of constantly tuning the print profiles. Mechanical components in sufficiently sized machines have a lifetime many times longer than that of an LCD panel if they receive proper care with regular servicing. Another common enemy of the printer is dust, which in a dusty environment can easily clog cooling fans, their filters and UV LED optics inside the machine in just a few months, and it needs to be removed.
How quickly can it be learned?
The shortest answer is: really fast! It is important not to be afraid, to be properly trained, and after the first two lessons you will have acquired the basics with which you can do much more than the model making described in this article. If a print fails, customer support via phone or email can usually easily identify the cause of the problem and correct it. Training will save you the frustration of weeks of trial and error associated with self-study from internet discussions.
The advantages and benefits of 3D printing
Nowadays, 3D printers do not have the ambition to completely replace milling machines (at least for the next few years), rather it is a manufacturing tool that can handle some operations better, faster and cheaper than a milling machine, it can perfectly replace some of the traditional manually laborious procedures and save considerable time, technology and material costs. Production using 3D printing is easy, fast, cost-effective, and you have full control over the entire process. Working with digital data (transfer, archiving, editing) is comfortable and convenient, production is clean, efficient and fast with the advantage of easy repeatability, and any leftover material can be reused.
Do you want to bring your idea to life? Contact us for professional advice in SLA 3D printing. We will design the most suitable material, handle the complete production of your product, or deliver and help integrate the manufacturing process, including the technology.
Learn more about our 3D printing services, explore the consultancy offered, or schedule a meeting directly.